The lip bumper is a fixed functional orthodontic appliance, that works by altering the equilibrium between cheeks, lips and tongue, and by transmitting the forces from perioral muscles to the molars where it is fixed.
It has has been used for various purposes:
- Molar anchorage.
- Adjunctive therapy in correction of lip sucking habit.
- Space gaining in the lower arch.
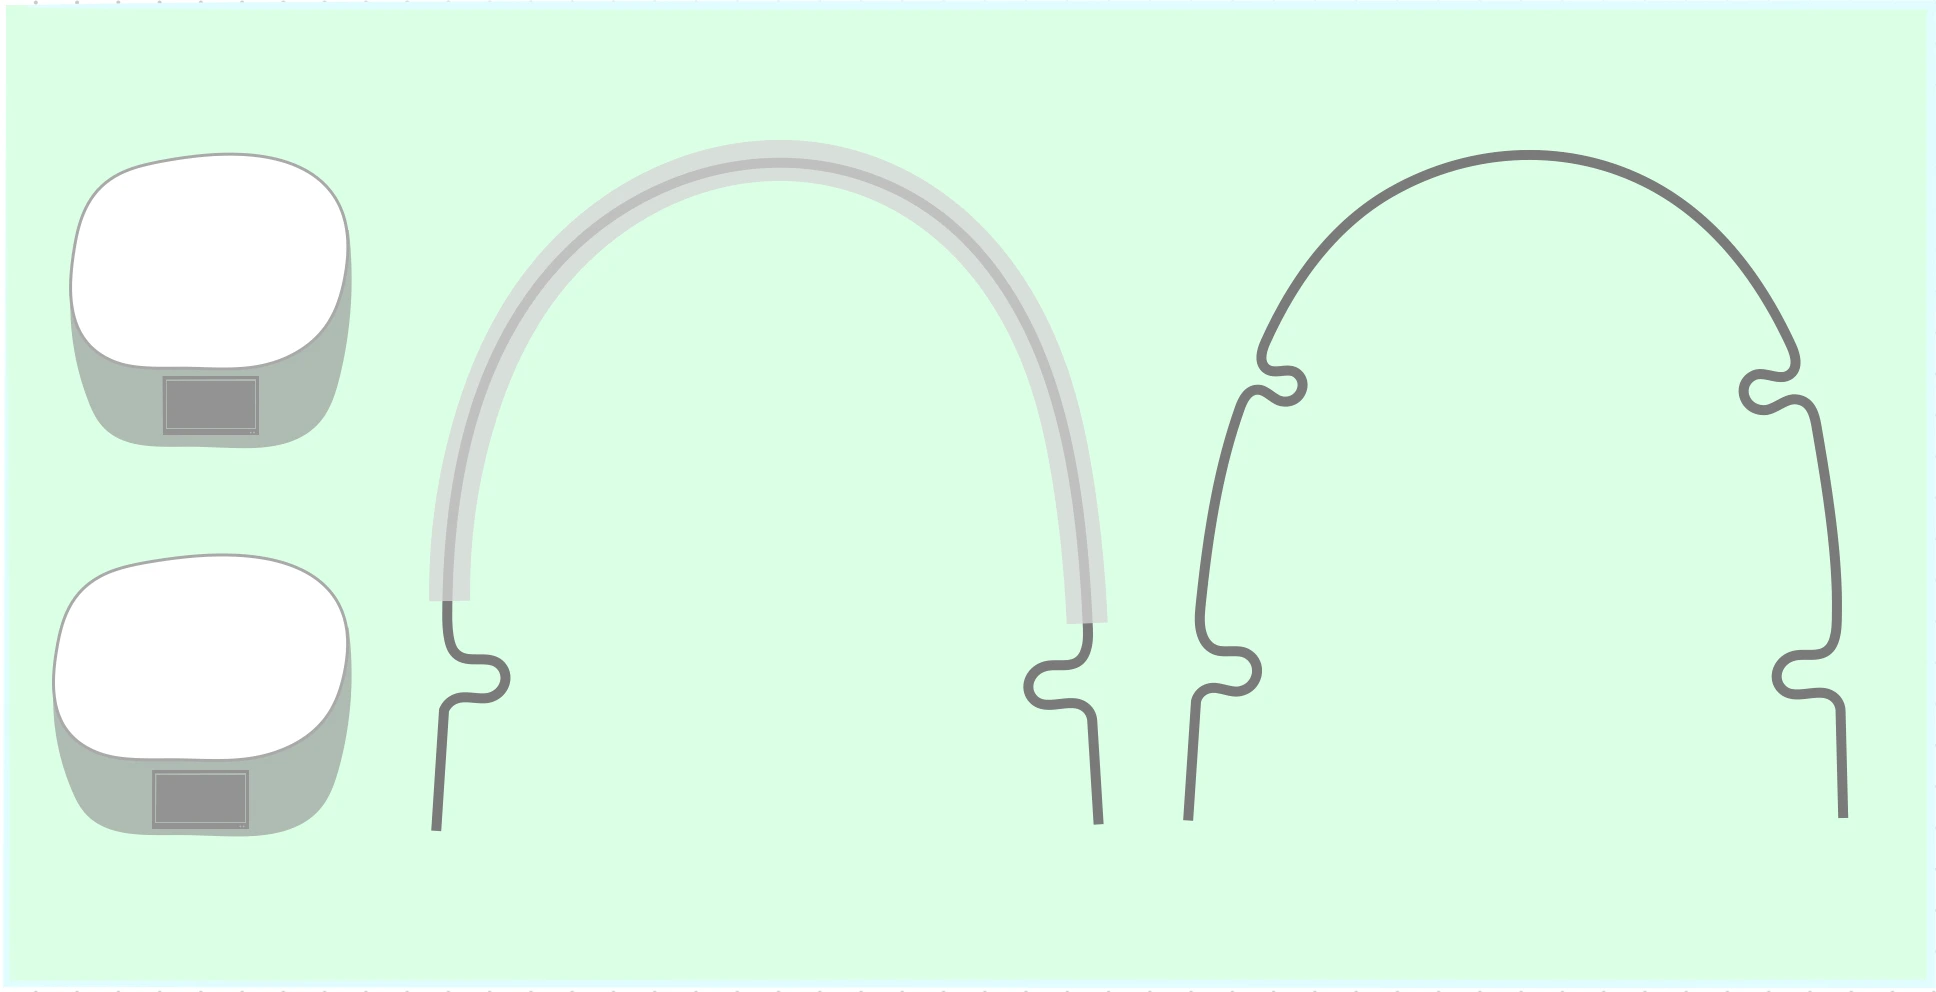
Cetlin has described two different types of lip bumper:
- Custom made two-looped: Consists of two loops at the molar level that allow modifications of the appliance during therapy.
- Preformed with four loops: Have two loops at the molar level and two at the canine level. The additional loops give a better shielding effect in the canine region and allow the use of Class III elastics in more severe cases.
Characteristics
Lip bumper is made up of two parts: Removable and fixed.
Fixed Part
- Composed by two molar bands cemented to first (or second molars, if possible) with 0.045" tubes.
- The tubes have a 4o mesial offset to facilitate insertion and a stepout to prevent gingival impingement.
Removable Part
- Composed by a 0.045" SS wire that runs in the lower vestibule from molar to molar between teeth and lip and cheeks.
Design Considerations
- The lip bumper must keep cheeks and lip away from the dentoalveolar area, and this shielding effect must be verified at each appointment.
- The lip bumper should be wider buccally and flatter anteriorly than the natural arch-form it is desired to produce because the dentoalveolar widening and reshaping are induced by the tongue and lip bumper (without direct appliance force).
- The lip bumper should not exert any expansion or contraction forces on the molars. It must be easy for both the clinician and the patient to insert and remove. As the arch anterior to the molars respond to the reshaping and widening of the lip bumper, they take on wider natural arch-form.
Positioning
Transverse Position
- The wire must be 2 mm from the lower canines and 3-4 mm from the premolars.
- Protection of the canine area is crucial and the four-looped bumper is more effective.
Sagittal Position
- The lip bumper should not be more than 1-2 mm away from the labial surface of lower incisors.
- This position offers good support of the lower lip for the anterior seal without rendering the appliance uncomfortable.
Vertical Position
-
Lateral segments: The wire must be positioned generally at the middle third of premolar and canine crowns (can be adapted to rest deeper in the vestibule in severest cases, in which good vertical control is necessary). The cheeks override the bumper during function, producing an intrusive force on lower molars.
-
Anterior segment: The wire can be positioned at three different levels with respect to the incisor crowns (depending on the overbite) :
- Incisal edge: Used during the initial phase of treatment. It helps to upright mesially inclined molars because the lower lip tends to lift the anterior part of the bumper, creating a lower lever effect on the molars.
- Middle third: Used when a shielding effect on incisors is desired. It keeps the lower lip away from the teeth and alters the equilibrium in favour of the tongue, allowing the incisors to translate labially.
- Gingival third: In this position, the lip bumper must be kept very close to the incisors. It is used when the orthodontist does not want to alter the equilibrium between centripetal and centrifugal forces, as the lower incisors maintain their position while still being under the lower lip action.
Activation
The lip bumper can be activated to correct the rotation of the lower molars.
- Time: Activation of the lip bumper is best postponed until near the end of space gaining phase because at that stage the molars are easier to control and the patient will tolerate it better after a few months of wear.
- Technique: A slight bend is placed in one terminal (or both, if necessary), that adds approximately 1 mm of expansion to counteract the tendency of lower molars to tip lingually. In some cases, where the lower molars are lingually inclined, the appliance can be expanded (activation should not exceed 1-1.5 mm per side).
- To prevent any change in the activation, the bumper is tied with an elastic chain. This toe-in makes it difficult for the patient to remove the appliance.
Clinical considerations
- The appliance must be worn 24 hours a day and should be removed only for meals and hygiene. Although, patient adaptation may not be optimal during the first month, the appliance should be worn as much as possible during that time.
- The two-looped bumper has the shrink tubing that gradually discolors as the patient wears the device.
- If cooperation is still a problem after a few months, the appliance can be tied to molar hooks with an elastic chain.
- If the appliance has been well fitted, a red line can be seen on the inside of the cheeks and the lower lip where the wire runs.
- If the lip bumper is too distant from the teeth, ulcers may appear. In such cases, the appliance is removed for a day or two, lesions are allowed to heal and treatment is restarted with an appliance that runs closer to the teeth.
- At each appointment, the bumper is checked to ensure that it is still passive on the molars and maintains the desired distance from the teeth.
- The patient may be given a card showing the positions of the two terminals and should be advised always to check these positions before inserting the appliance. This prevents undesirable mechanical expansive forces on the molars.
- The use of lip bumper is discontinued at the end of the space-regaining phase. However, if it is needed for anchorage problems, it can be readapted such that it does not contact brackets, while not being too procumbent.
References
- Orthodontics Current Principles and Techniques (5th edition), Xubair, Thomas M. Graber, Robert L. Vanarsdall, Vig, Elsevier Mosby.
*This article is an excerpt from the above mentioned book and Medical Sutras does not make any ownership and affiliation claims.